
Creating Visitors
New visitors can be created:
in the general Visitors directory, or
within a particular visit's details, in which case the visitors will be automatically added to that visit.
The process is similar, with variations highlighted below.
To create a new visitor, follow these steps:
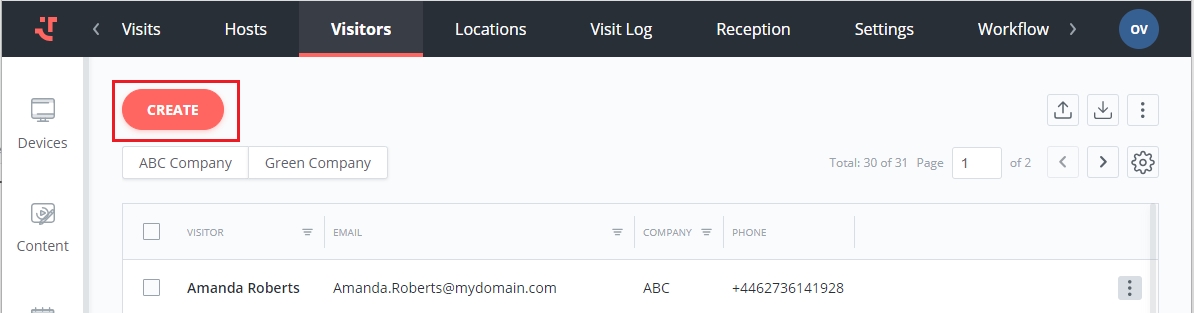
a) Navigate to the "Visitors" tab and click the "Create" button.
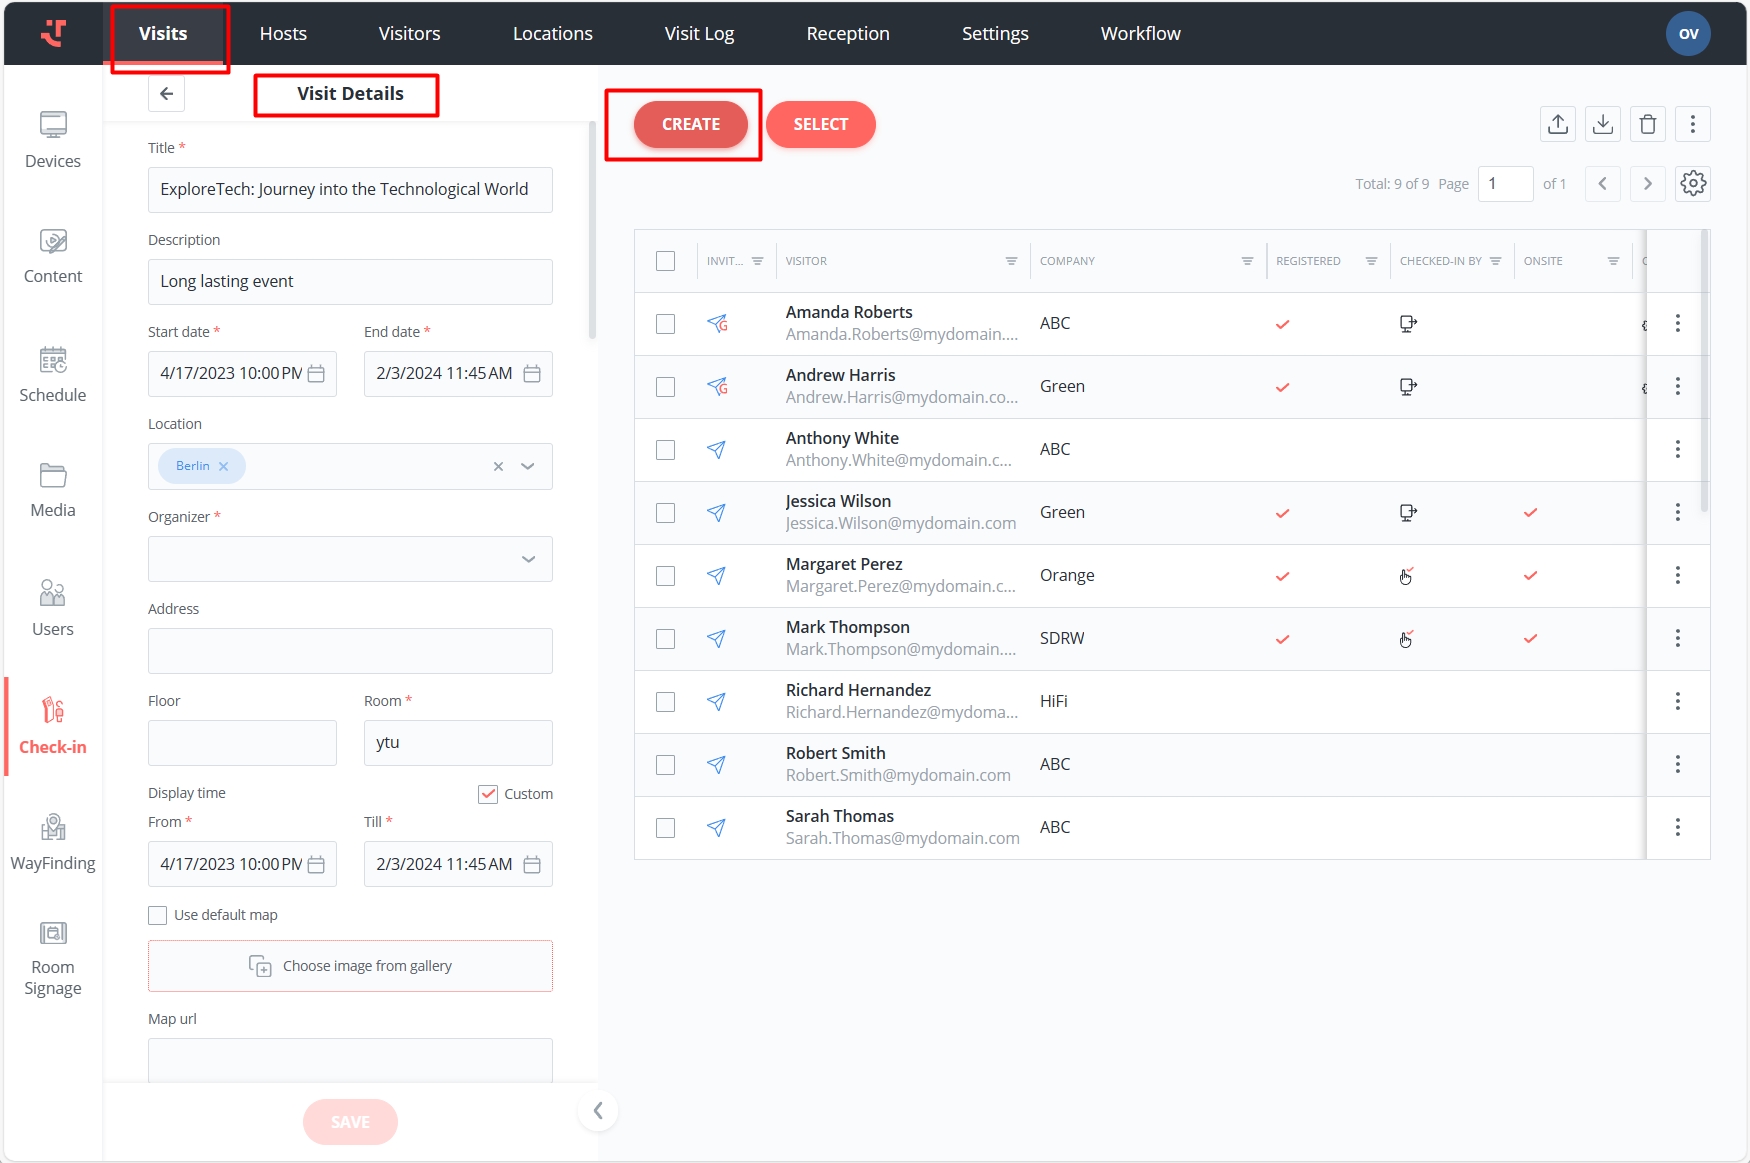
b) Navigate to the "Visits" tab, open a visit, and click the 'Create' button in the visit details.
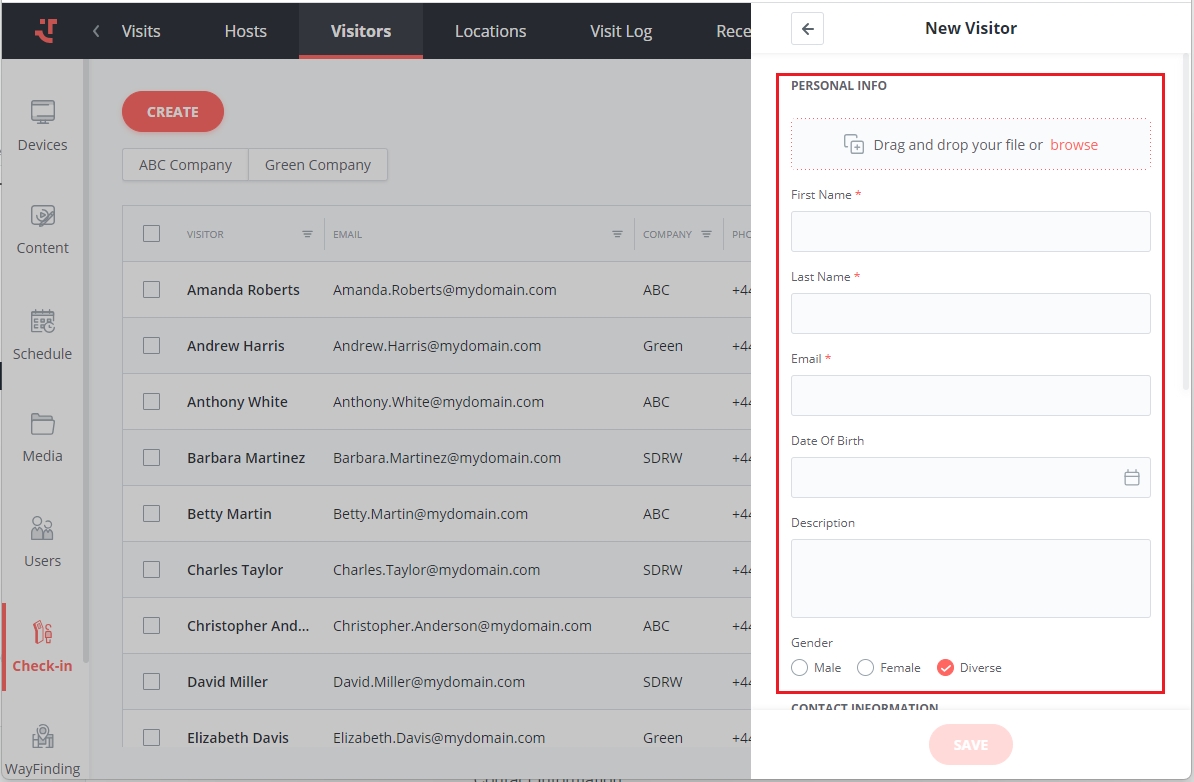
Fill in the visitor data under the following categories:
Note that certain fields are mandatory and must be unique. The required fields are defined in the 'Fields and data' settings section.
Personal Information
Photo. Supported file extensions include: *.jpg, *.jpeg, *.png.
First Name, Last Name, Email, Date of Birth, and optional Description.
Gender (used in invitations).
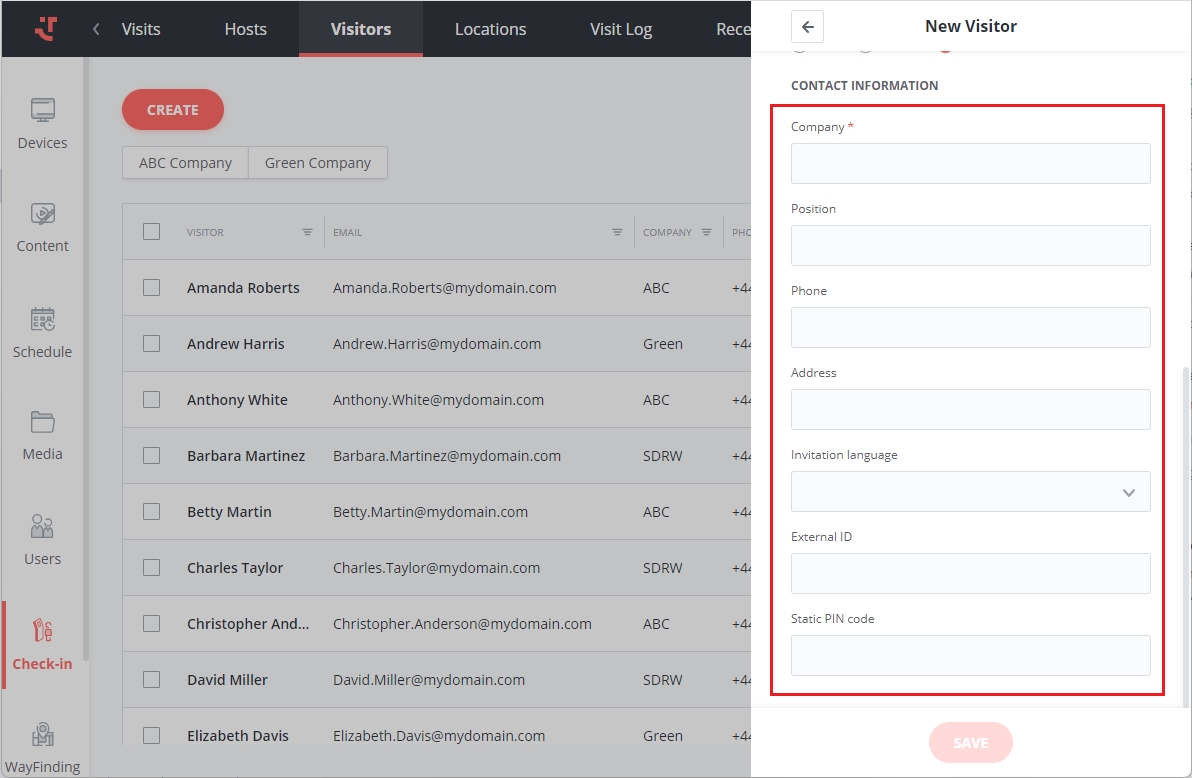
Contact Information
Company and Position
Phone and Address
Invitation language: Invitation emails are sent in the default language set up in the 'Notifications' settings section. However, if you wish to specify a different language for the given visitor's invitation, you can do so here.
External ID: This field serves two purposes.
You can use it for reference to the person's existing ID from a third-party system (also via Entra ID integration).
Alternatively, you can leave it empty and enable autogeneration of visitor external IDs in Check-In Settings. The system will then create a constant unique code allowing the person to easily check in for any visit they are part of in the future - ideal for regular visitors.
Static PIN code: A constant unique code assigned to the given visitor. For instance, permanent employees may use it to check in on kiosks and access the building. You have the option to configure the PIN code length in Check-in Settings.
Finally, click the "Save" button.
Last updated
Was this helpful?