# Creating a Visit and Inviting Visitors
Before creating a visit, you may want to [add hosts](/visitor-management/creating-a-visit-and-inviting-visitors/creating-hosts.md) (contact persons). One of these individuals will be designated as the **organizer** in the visit form.
If your organization has multiple buildings/venues/sites and you want to manage visitors there, you can also [add locations](/visitor-management/creating-a-visit-and-inviting-visitors/creating-locations.md).
## Creating a visit
To create a new visit, follow these steps:
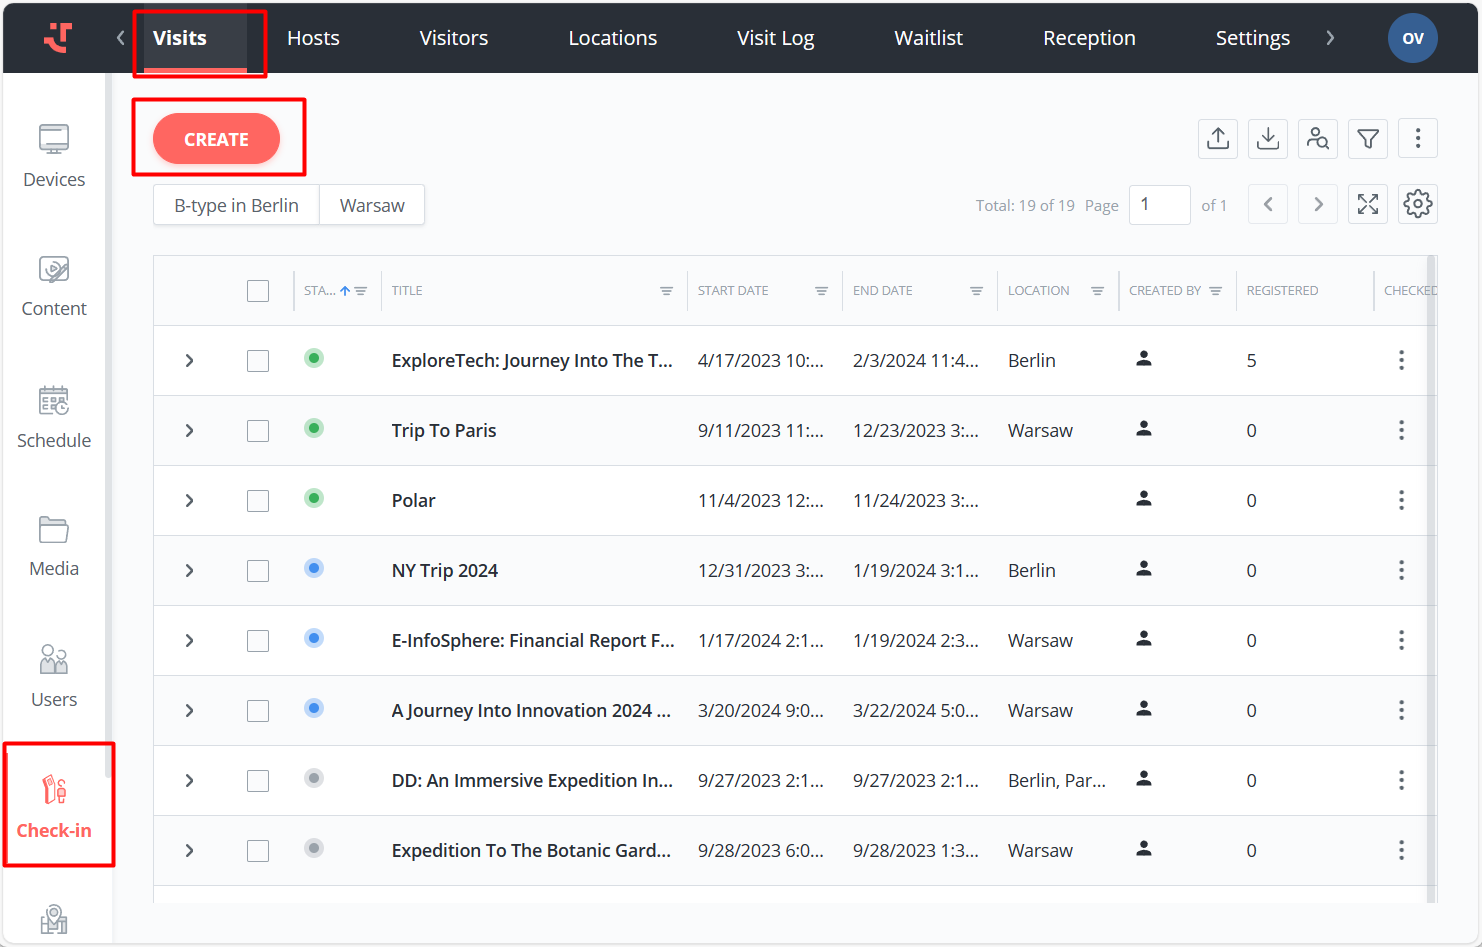
1. Go to **Check-in → Visits**.
2. Click **Create**.
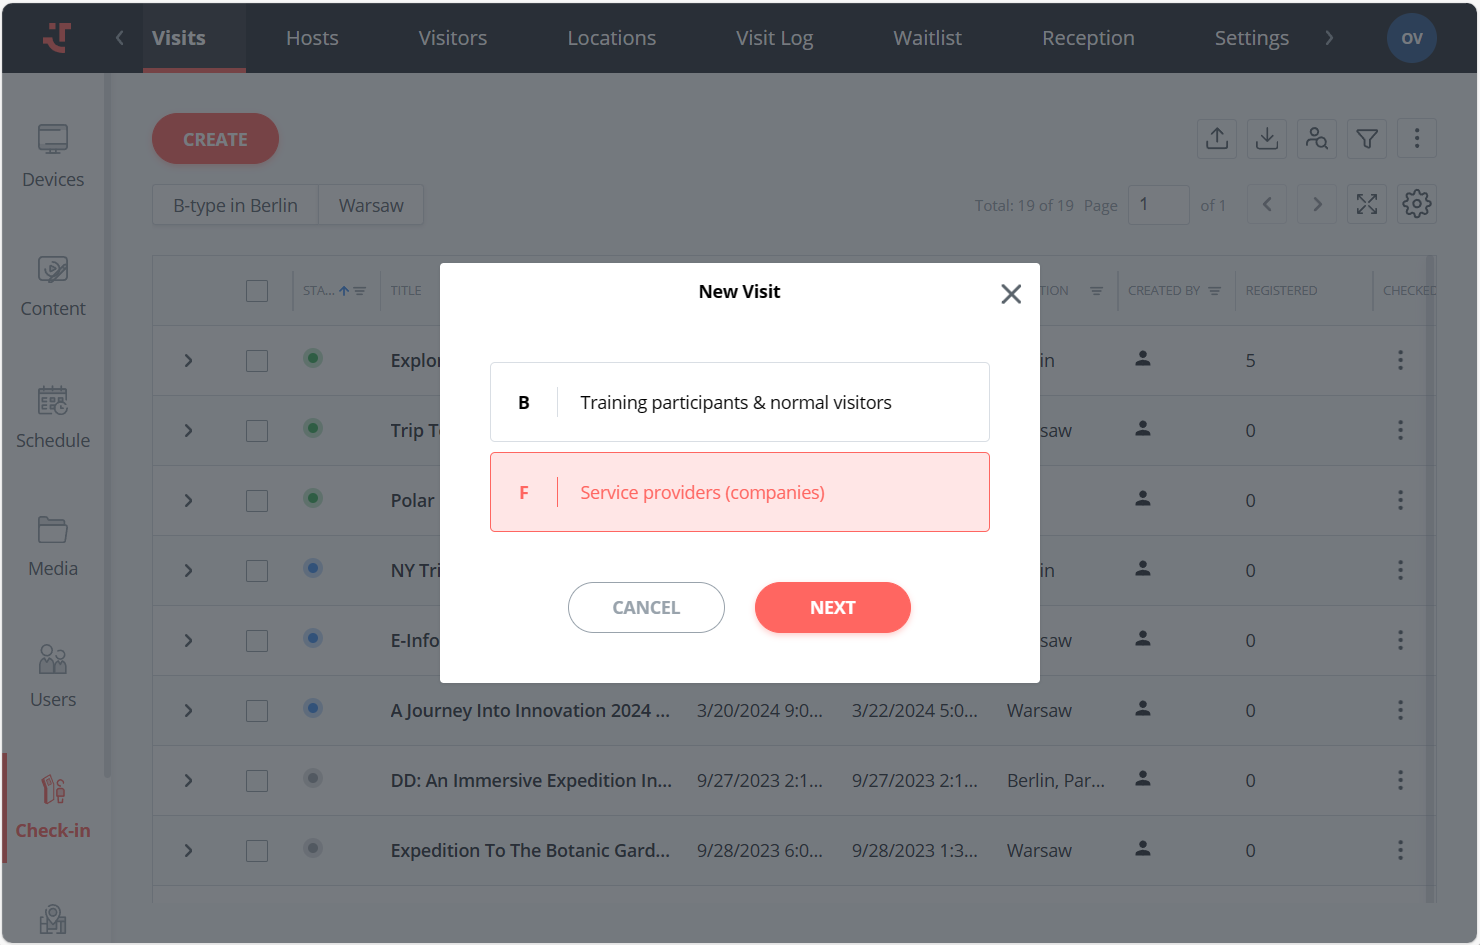
3. Select a **visit type** and click **Next**. The different active visit types are listed in a pop-up only if you have [added and configured them in the Settings](/visitor-management/check-in-module-settings/visit-type-configuration.md). The default visit type is pre-selected.
{% hint style="info" %}
Depending on the selected visit type, the fields associated with the visit may differ accordingly. This flexibility allows for tailored and specific information collection based on the nature or classification of the visit.
{% endhint %}
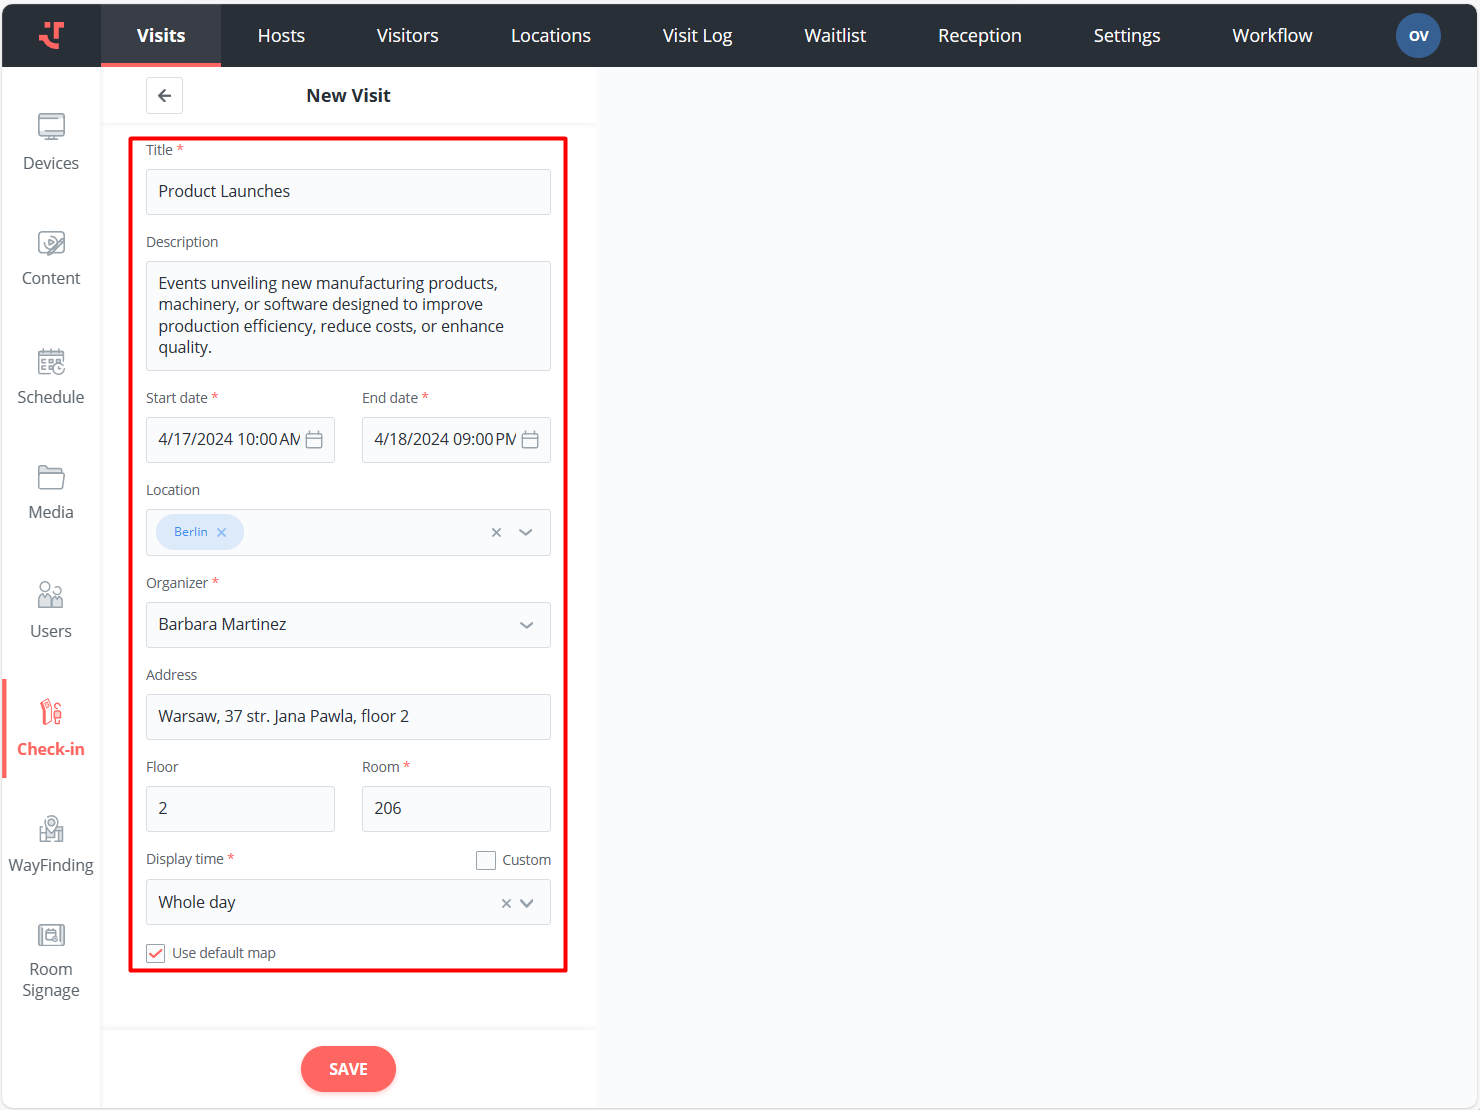
4. Fill in the required fields, including the visit title, start/end dates and times, and the organizer's name. Other fields, including description and location details, are optional.
{% hint style="info" %}
The default address and map can be configured in [settings](/visitor-management/check-in-module-settings.md) to auto-populate these fields.
{% endhint %}
5. Click **Save**.
## Adding visitors to the visit
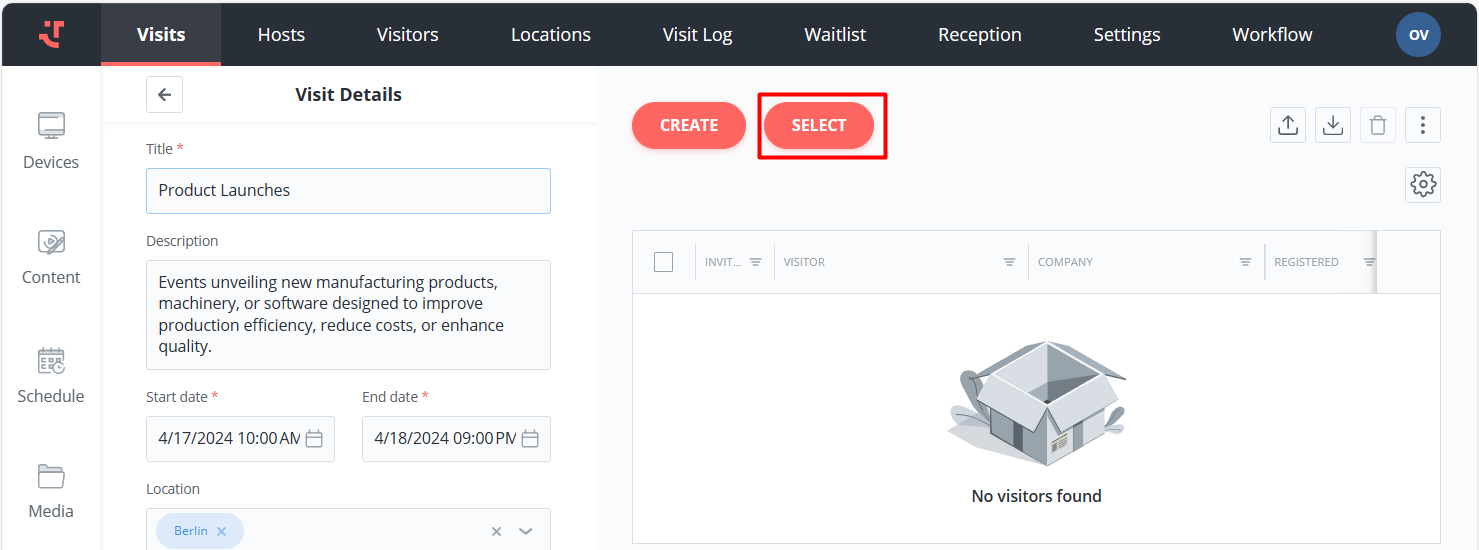
To add visitors to the visit, you can:
* [Create](/visitor-management/creating-a-visit-and-inviting-visitors/creating-visitors.md) or [upload](/visitor-management/creating-a-visit-and-inviting-visitors/uploading-visitors-from-file.md) them directly in the visit details form — refer to the respective instructions.
* Select the visitors who have already been created or uploaded before — read below.
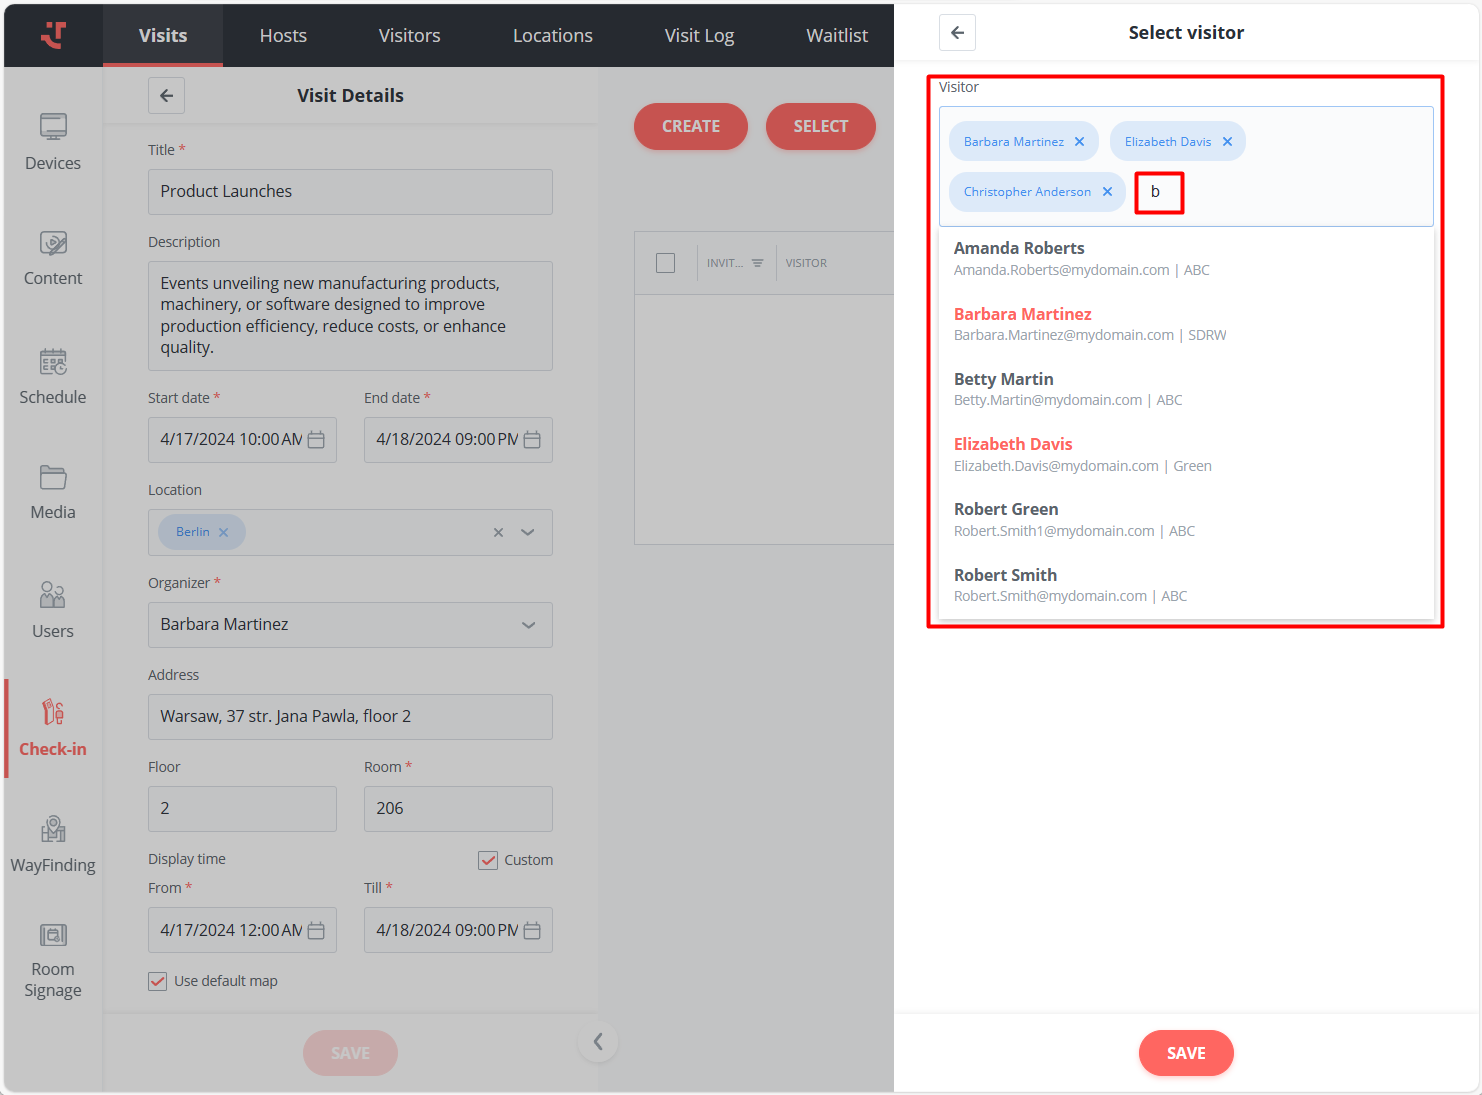
To select existing visitors, follow these steps:
1. On the **Visits** tab, open a visit to view its details, and click **Select**.
2. Search for visitors by entering at least 3 letters of their name, then select the intended individuals.
3. Click **Save**.
As a result, the selected visitors will be added to the visit.
Now you can take different actions with your visitors, such as [sending invitations](/visitor-management/creating-a-visit-and-inviting-visitors/sending-personal-invitations.md) or [manually checking them in](/visitor-management/workflow-configuration/check-in-at-a-kiosk/manual-check-in-on-the-platform.md).
---
# Agent Instructions: Querying This Documentation
If you need additional information that is not directly available in this page, you can query the documentation dynamically by asking a question.
Perform an HTTP GET request on the current page URL with the `ask` query parameter:
```
GET https://docs.friendlyway.com/visitor-management/creating-a-visit-and-inviting-visitors.md?ask=
```
The question should be specific, self-contained, and written in natural language.
The response will contain a direct answer to the question and relevant excerpts and sources from the documentation.
Use this mechanism when the answer is not explicitly present in the current page, you need clarification or additional context, or you want to retrieve related documentation sections.